

How To Build A Quinzee Snow Shelter
- Team JCC Abrams

- Feb 24
- 3 min read
From Jacey, Our Teva (Science & Nature) Specialist

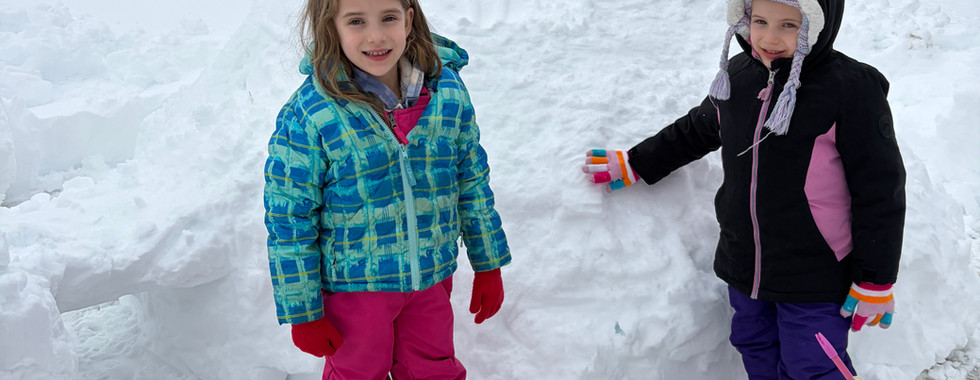
When the snow starts falling, we cannot help but think about all the ways camp kids would turn it into something magical.
Snow days are made for building. For experimenting. For getting a little messy. For trying something new.
Our Teva specialist, Jacey, put together a simple guide so your family can build a Quinzee right at home. It is hands-on, a little bit science, a little bit teamwork, and a whole lot of winter fun.
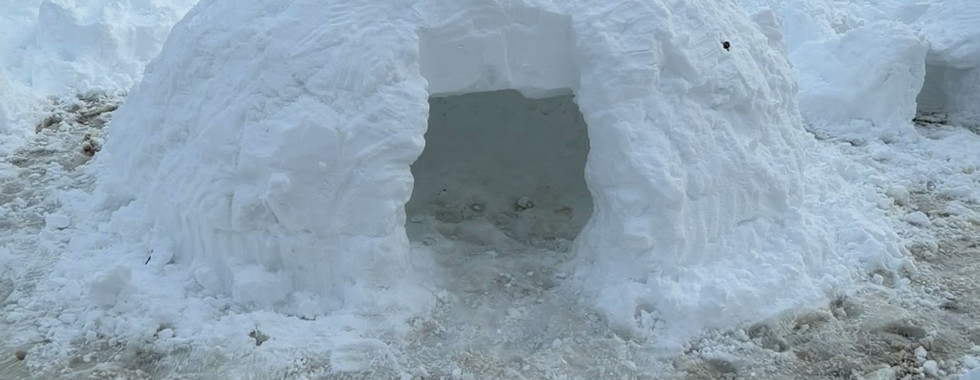
A quinzee is different from an igloo. Instead of stacking snow blocks, you pile up snow into a big mound and then hollow it out.
Here is how to do it.


Step 1: Choose Your Spot
Pick a safe space in your yard that is:
Flat or gently sloped
Away from roads or heavy tree branches
Easy for adults to supervise
If you have a slight hill, even better. You will dig the entrance on the downhill side.
Step 2: Build Your Snow Mound
Pile snow into a large mound. Bigger really is better here.
As you build:
Pack the snow down.
If the snow is very powdery, sprinkle a little water to help it stick.
Let the mound sit for at least 1 to 2 hours before digging. This helps the snow bond together and become stronger.
This waiting part is hard. We know. But it makes a big difference.
Step 3: Add Measuring Sticks
Jacey’s biggest pro tip
Poke measuring sticks straight into the mound from the outside. Push them in about one foot deep.
When you start hollowing out the inside, you will stop digging when you see the ends of the sticks.
That means your walls will stay about one foot thick, which is strong and safe.
Walls can be 1 to 2 feet thick, but one foot is great. Like the sticks.
Step 4: Dig the Entrance
Dig a small entrance on the downhill side of the mound.
Keep it small at first. You can always widen it later.
If the inside floor is slightly higher than the entrance, that helps trap warmer air inside. Cold air sinks, so this simple trick actually makes it more comfortable.
Step 5: Hollow It Out
Now the fun part.
One person can dig from the inside while another helps from the outside. Scoop snow out slowly and carefully.
Stop when you see the ends of the measuring sticks.
Keep the ceiling rounded like a dome. Rounded shapes are much stronger than flat ones.
Step 6: Smooth the Inside
Once it is hollowed out:
Smooth the walls and ceiling with gloved hands.
Fill in cracks.
Keep everything curved.
This helps strengthen the structure and keeps loose snow from falling.
Teva Tips for Success
Pack first, dig later. The stronger your mound, the stronger your shelter.
Keep the ceiling rounded, never flat.
Poke a small air hole through the top with a stick for ventilation.
Always have an adult supervising.
No climbing on top. It is not built for jumping.
And remember, quinzes are for playing and exploring. Not for sleeping overnight.
Building a quinzee is not just a snow day activity. It is problem solving. It is teamwork. It is outdoor learning without even realizing you are learning.
It is the kind of hands-on adventure we love at camp.
If you build one, tag us. We would love to see your winter creations and celebrate your snow day magic right along with you. ❄️
This was such a fun and practical read I really liked how the post breaks down how to build a quinzee snow shelter in a clear, step‑by‑step way that makes it feel doable even if you’ve never tried this kind of outdoor project before, because it’s easy to get overwhelmed by wilderness survival tips but here everything feels accessible and grounded. The way it explains preparing the snow, shaping the mound, letting it settle, cutting the entrance and hollowing out the interior makes the whole process feel logical and safe, and the safety reminders about ventilation and checking the structure really help you think like someone who cares about doing it right rather than just racing through steps. I also liked tha…